



For as long as I can remember, and as long as I have been passionate about gardening, I have always dreamt that one day, I would have my very own greenhouse.
It was 1997, and my future husband and I were attending the annual BC home and Garden Show. One of the exhibitors was BC Greenhouse Builders, they had on display one of their Twin Wall Polycarbonate Greenhouses. I recall so clearly, walking in and saying "Some day I want a greenhouse just like this". Being just 21, I didn't know exactly when this was going to happen, I just knew it was something to dream about.
Fast forward 15 years, now having established myself in a house with the space to accommodate such a dream, my only limitation was budget.
Having lived in my new house for 6 months and with the warm days of spring calling to me. My thoughts of gardening at the forefront, an article in the local paper caught my eye "Garden Room No Longer A Pipe Dream". Oh the excitement that article and pictures brought to me, it renewed my longing for a greenhouse. I showed my Husband and told him "Here it is, this is the greenhouse I was dreaming about" It was an article that featured a BC Greenhouse Builder greenhouse. The same one I saw 15 years earlier at the Garden Show.
I decided to clip out the article and mount it nicely on some card stock and display it in prominent place in my kitchen. I had recently watched an Oprah show on vision boards, where you put a collection of things be it pictures, words and such that represent your hopes and your vision for your life and serve as a daily reminder of your aspirations and what you want your life to be.
It was 1997, and my future husband and I were attending the annual BC home and Garden Show. One of the exhibitors was BC Greenhouse Builders, they had on display one of their Twin Wall Polycarbonate Greenhouses. I recall so clearly, walking in and saying "Some day I want a greenhouse just like this". Being just 21, I didn't know exactly when this was going to happen, I just knew it was something to dream about.
Fast forward 15 years, now having established myself in a house with the space to accommodate such a dream, my only limitation was budget.
Having lived in my new house for 6 months and with the warm days of spring calling to me. My thoughts of gardening at the forefront, an article in the local paper caught my eye "Garden Room No Longer A Pipe Dream". Oh the excitement that article and pictures brought to me, it renewed my longing for a greenhouse. I showed my Husband and told him "Here it is, this is the greenhouse I was dreaming about" It was an article that featured a BC Greenhouse Builder greenhouse. The same one I saw 15 years earlier at the Garden Show.
I decided to clip out the article and mount it nicely on some card stock and display it in prominent place in my kitchen. I had recently watched an Oprah show on vision boards, where you put a collection of things be it pictures, words and such that represent your hopes and your vision for your life and serve as a daily reminder of your aspirations and what you want your life to be.
 The article printed May 2oth, it was framed and put up in the kitchen as a daily reminder.
Being a believer in the power of positive thinking, I put it out there in the universe that I was looking for a greenhouse, hoping to attracted one to me.
http://www.oprah.com/spirit/The-Law-of-Attraction-Real-Life-Stories_1
http://www.oprah.com/spirit/The-Law-of-Attraction-Real-Life-Stories_1

Doing one of my usual craigslist searches for greenhouses, I came upon this posting. When I saw this I thought OMG this is it, this is the greenhouse I had been dreaming about. I have been looking on craigslist for years, even before I had the space for a greenhouse, and I can honestly say I have never seen a posting for this type of greenhouse. This is the exact one that I wanted, the one that only 6 days earlier I had put it out there is the universe to bring to me. Not only that but the $850 price tag was an attainable figure for me. A new one would probably run me about $3000 including taxes and shipping, and that wouldn't have been happening for at least a few more years.
I immediately e-mailed the seller, this add was posted on the 23rd of May and it was now the 26th. I thought that for sure it was going to be gone by then but it was worth a try. I didn't get a response and getting really antsy I sent another e-mail saying I was reeeeeeally interested in it and gave my phone # so as to avoid any delays. That night at about 7:30 I received a phone call from the seller, she said it was still available but she had someone who said they were coming the next day to look at it. Well, I didn't like the sound of that, being that it was only located about a 15 minute drive from me I asked if I could come tonight and take a look. She agreed and I was off, the sun was going down but there was still going to be enough light to take a good look. I arrived and said right away yes, and gave her $100 and said I would be back the next day with the rest and to start to dismantle it. It came with benches which was a bonus, and that was that, I now own a greenhouse!!
I immediately e-mailed the seller, this add was posted on the 23rd of May and it was now the 26th. I thought that for sure it was going to be gone by then but it was worth a try. I didn't get a response and getting really antsy I sent another e-mail saying I was reeeeeeally interested in it and gave my phone # so as to avoid any delays. That night at about 7:30 I received a phone call from the seller, she said it was still available but she had someone who said they were coming the next day to look at it. Well, I didn't like the sound of that, being that it was only located about a 15 minute drive from me I asked if I could come tonight and take a look. She agreed and I was off, the sun was going down but there was still going to be enough light to take a good look. I arrived and said right away yes, and gave her $100 and said I would be back the next day with the rest and to start to dismantle it. It came with benches which was a bonus, and that was that, I now own a greenhouse!!
 Choosing the site
Choosing the right site was important. I already knew when we purchased the home what area would make the perfect spot for a greenhouse. A place that gets the most light, with the longest wall facing south.
 This was it, but first I needed to remove the tree and existing plant material that was in the way. I advertised the Plum tree on craigslist and had someone come and dig it up and take it away. The other plants were tired and just went into the green bag.
 Next was to install the electrical, I dug the trench and my husband took care of the rest. Roughly placing the metal base to get an idea of where to run the electrical, where to remove the grass and where to dig for the base.
 Next digging the trench, and leveling the ground.
 Once the trenches were dug, I layed landscape fabric down not to prevent weeds but to keep the gravel and dirt separate. Adding the gravel to the trenches took some patience, stopping to make sure everything was level.
 The one trick to this install, was the fact that the back yard isn't flat, there is a slight hill, right were the greenhouse was going to be sitting. You can see by this picture the west side is just above the level of the grass with the east side about a foot below.
 Next, installing the metal flashing around the edge of the ceder posts.
 Laying out and securing the front and back frame. Getting ready for installation.
 And up she goes, with the frame up and secured, next is to clean and reinstall the panels. I must tell you, it took a long time to get to this point. Weeks to clean all the framing of old caulking and washing and scrubbing the panels, a little sweat equity, but I was enjoying the process.
 And here we have it, the final product, re-assembled and ready to grow. I started the process in May, I gave myself a time line of having it finished by the end of the summer and this was the September long weekend and it's done and I'm so happy.
 It has two automatic vents.
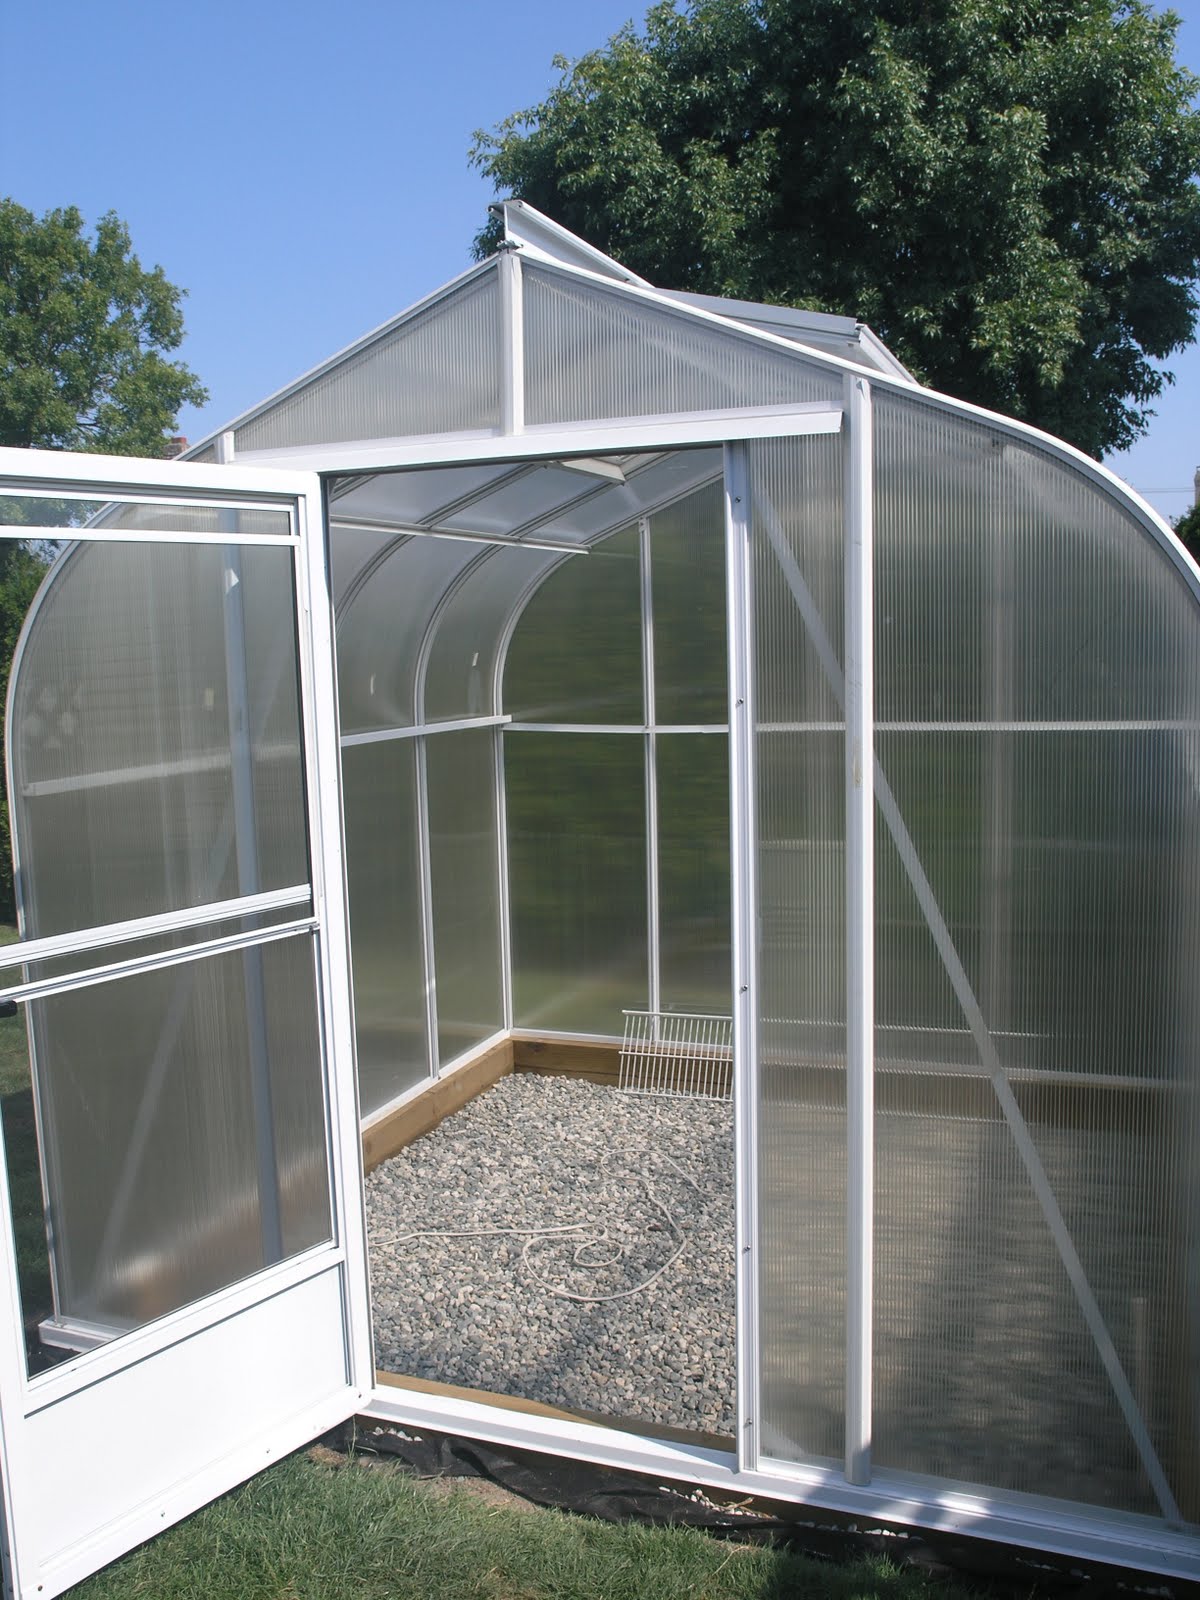 To me a greenhouse represents endless possibilities.
 Fast forward to January 2012, and with just a few things overwintering in the greenhouse, the fun is just beginning. With the seed catalogs arriving, I can now look at them with new eyes, so much more is now possible.
One thing I would have to say about this greenhouse, it is a BC Greenhouse Builder, the Sun Garden style greenhouse.
http://www.bcgreenhouses.com/hobby_greenhouse_kits/special_offer.php
When I phoned up a said I needed to reinstall my sun garden greenhouse they were more than helpful. When ordered the new foam tape they were able to tell me exactly how much I needed and had the special sealant and caulking needed also, to top it all off they sent me the installation manual and DVD. What service. I would highly recommend them if you are looking to buy a greenhouse. These are well build, I can vouch for that, considering this was the second time my greenhouse had been moved.


 Lots of new Raspberry canes have popped up this year.


 The Japanese Maple "Bloodgood" is looking great, the deep purple leaves is a nice contrast to the green of the garden. The feathery white flower stalks of the Astilbe with the green of the Christmas Fern are a nice combination


 The blue grass is looking really blue and has a few flower stalks emerging, not bad for a free craigslist plant. I have also planted some sunflower transplants and marigolds along the front of the fence. The Ginkgo Biloba trees has put out a lot of leaves in it's third year at this location.


 Posts
Posts


